Archive forComputer Networking Testbeds

Request Rspec for the Simple Experiment

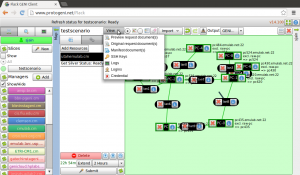
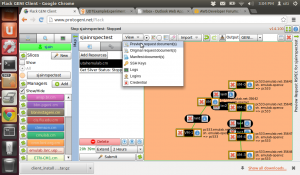
I downloaded this Rspec by clicking on View -> Preview Request Document and then on the next screen click on the Download button. See screenshots below:


Getting the Request Rspec

Getting the Request Rspec

Download Rspec

Download Rspec


The Rspec itself is here. If you know a little bit about XML, you can read and understand this Rspec specially if you keen the network picture handy to cross reference.

Go ahead and remove the tag <history:slice_history….> and its content to get the rpec below. If you look closely, you will know how to add nodes, interfaces and connections in your own network. You will get this file.


Comments off

Automating the Simple Experiment: First Step (Test)

Once your experiment starts growing, it will be impractical to log on to each node to execute commands. Fortunately there is a way to automate things. Again using the simple experiment from the previous post, although it does not really need to be automated due to the small size…

Here are the script that I will now manually copy over to the client and server sides  and then execute them from the terminal. Note that since I already installed iperf on VM-0 and VM-4, I chose two different machines in my graph to test these scripts

————————————————————————————————————-

CLIENT SCRIPT

————————————————————————————————————-

#!/bin/sh

# Usual directory for downloading software in ProtoGENI hosts is `/local`
cd /local

##### Check if file is there #####
if [ ! -f “./installed.txt” ]
then
#### Create the file ####
sudo touch “./installed.txt”

#### Run one-time commands ####

#Install necessary packages
sudo yum -y install iperf& EPID=$!
wait $EPID
fi
sudo /usr/bin/iperf -c VM-3 -p 5001 -t 90 -i 1 > iperf_client.txt

————————————————————————————————————-

SERVER SCRIPT

————————————————————————————————————-

#!/bin/sh
# Usual directory for downloading software in ProtoGENI hosts is `/local`
cd /local

##### Check if file is there #####
if [ ! -f “./installed.txt” ]
then
#### Create the file ####
sudo touch “./installed.txt”

#### Run one-time commands ####

#Install necessary packages
sudo yum -y install iperf& EPID=$!
wait $EPID
fi
sudo /usr/bin/iperf -s -p 5001 > iperf_server.txt

————————————————————————————————————-

I execute these scripts manually using the following commands on the two VMs

[user@VM-3]cd /local
[user@VM-3]sudo chmod +x client.sh
[user@VM-3]sudo ./server.sh

[user@VM-1]cd /local
[user@VM-1]sudo chmod +x client.sh
[user@VM-1]sudo ./client.sh

Everything went well, so I am now ready for the second step of automation…..

Comments off

A simple experiment

Lets run a quick sample experiment to see how this whole thing ties in together. I will do this the hard way i.e., manually just to test the waters and understand what I need for an automated experiment.

I have constructed a network graph and I am logging on to one of the machines (ssh) to run the iperf server.
Sample network graph

Sample network graph

I will start an iperf server on VM-0 and an iperf client on VM-4.

Note that I will need to use sudo with all commands that I type here because al commands run as a user with super user priviledge.

When I looked for iperf command on VM-0, I got an error, see below

[user@VM-0 ~] sudo which iperf
iperf: Command not found

This tells me that iperf is not installed, so make a note that I need to install iperf before I can start my experiment. Since this machine is running fedora, I will use the yum package manager to install iperf

[user@VM-0 ~] sudo yum -y install iperf

I am interested in the last few lines of the output

Installed:
iperf.x86_64 0:2.0.5-3.fc15

Lets check where iperf is located now:

[user@VM-0 ~]$ sudo which iperf
/usr/bin/iperf

Note that the PATH variable is not necessarily set, so we need to provide the entire path to commands unless we explicitly set the PATH environment variable. 

Now I start my iperf server

[user@VM-0 ~]$ sudo /usr/bin/iperf -s -p 5001 > iperf_server.txt
————————————————————
Server listening on TCP port 5001
TCP window size: 85.3 KByte (default)
————————————————————

Next I will follow the same steps and run the iperf client on VM-4.

[user@VM-4 ~]$ sudo /usr/bin/iperf -c VM-0 -p 5001 -t 90 -i 1 > iperf_client.txt
————————————————————
Client connecting to VM-0, TCP port 5001
TCP window size: 16.0 KByte (default)
————————————————————
[ 3] local 10.10.5.2 port 54339 connected with 10.10.1.1 port 5001
[ ID] Interval Transfer Bandwidth
[ 3] 0.0- 1.0 sec 11.9 MBytes 99.6 Mbits/sec
[ 3] 1.0- 2.0 sec 11.4 MBytes 95.4 Mbits/sec
[ 3] 2.0- 3.0 sec 11.5 MBytes 96.5 Mbits/sec
[ 3] 3.0- 4.0 sec 11.5 MBytes 96.5 Mbits/sec
[ 3] 4.0- 5.0 sec 11.2 MBytes 94.4 Mbits/sec
[ 3] 5.0- 6.0 sec 11.5 MBytes 96.5 Mbits/sec

Once this experiment finishes, I can collect my data from the files that I stored it in i.e.
iperf_client.txt and iperf_server.txt
Comments off

What is in a Name:A note about node names in your experiment

Before we start an experiment, let me clarify something about resource names in GENI. When you reserve your resources, you will see two names in your network graph. One name is on the resource picture, and the second one is right next to it. See picture below:

names

The name next to the resource, for example PC522.emulab.net is the name you use to connect to that virtual machine from outside the GENI network i.e., from your desktop or laptop when using ssh. The name that is on the picture which is VM-4 for PC522 is the one you will use in your experiment scripts that runs inside GENI. This makes a big difference so please understand the difference and make a note of it. If you use the external name in your experiment scripts and commands, you will find that regardless of how you draw the graph, all your nodes selected from the same GENI aggregate (in this case emulab) are directly connected to each other i.e., they belong to the same subnetwork. For all practical purposes, your experiment will use the internal names and IP addresses.

The internal names are user configurable. Depending on your experiment needs, you can change the internal names by clicking on the on the node and editing the name on the next screen as shown below.

change_name

Comments off

Being a good citizen: Releasing resources

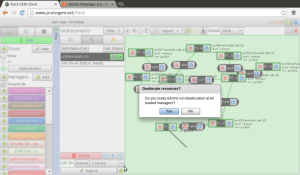
Once you have completed your experiment, you must release the resources you have used. You do so by clicking on the delete button and select “delete everywhere”

delete

delete_all

Comments off

SSH into a reserved resource

In order to log on to one of the resources, you need to download a private key and save it in the .ssh folder in your home directory. If you are using Windows based ssh clients, use the specific directions provided by that client…

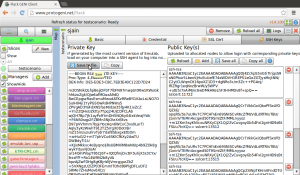
Download the private key.. well look at the pictures below…

view

print_to_file


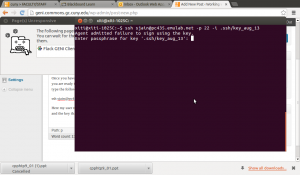
Once you have downloaded the private key and given it a name that you will remember, you are ready to log on to the console of any resource. On linux, I just open a terminal and type the following command….

ssh username@pc435.emulab.net -p 22 -i .ssh/key_aug_13

Here, the PC I am connecting to is pc435, port number 22 and the key that I just saved is called key_aug_13 and it is in the .ssh directory. You will find the resource name next to the picture of the resource on the flack screen

terminal


Note that I am asked to enter a passphrase for the key. The passphrase is something you set up when you configure your account on the GENI portal. If you forgot the passphrase, you can either use the ssh command to remove passphrase from the key or generate a new key and start all over again.

Now that you have access to the console of this machine, you can do what ever you like. I will write about an example later. But first lets learn how to delete and release resources so that others can use it…..

Comments off

Experiments using flack

Now you are ready for your first experiment!!

The next steps are to design the network and reserve resources…

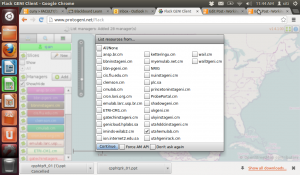
1) Select the sites from where you want to get resources. You will see something like this

list_resources

As a beginner, I used only one site to start with, it can be any site you like. Once you make that selection. click continue at the bottom of the popup window. This will take you to the next screen where you will see that the site is “discovering resources”. See screenshot below.

discovering


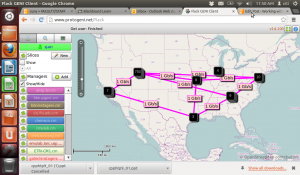
You might have to wait for sometime, just stare at the screen or get a warm beverage to distract yourself and resist the urge to back or refresh buttons on your browser. Eventually, the wait will be over and you will see the following screen with a message on the top “Get user: Finished”

wait_is_over

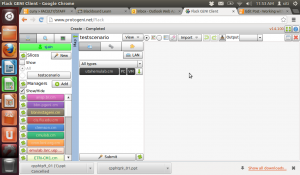
2) Now you can add a new slice, by clicking  the button near the top of the left bar. Give your slice a meaningful name to reflect the kind of work you will be doing. I am calling mine testscenario. You will see the following screen: create_slice

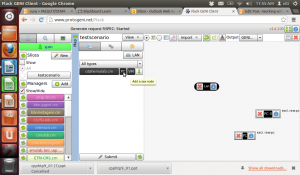
3) Add some resources to your slice. You can add a PC or a VM. You can also add a lan. You just need to click on the resource you want to add like this:

add_resource

CAUTION: If you ever make a mistake on this page or any other point, do NOT hit the back button on your browser. If you do, then you have to start all over again!! I have made this mistake a countless number of times. 

Try not to add a bare metal PC in your experiment although that is what I show in this example. Bare PCs are used only if there is a special need for it in an experiment. Most experiments can work just as well with VMs.

4) After adding resources to your slice, you need to connect them. Simply click near (no on) one of the objects you want to connect. You will see a black line. Drag the mouse to the object you want to connect to. A green line will appear and your objects will be connected.

Note that this is a logical connection not a physical one. So the two objects may physically be separated from each other but are logically connected. Here is my sample network.

sample_network


5) Now click the submit button, click yes on the pop-up message to confirm the creation of a new sliver and wait for the request and response to complete. The background of your scenario will turn yellow and then finally green when the sliver is created and ready for you.

Sliver resources being reserved

Sliver resources being reserved 

Sliver resources reserved, ready to start experiments

Sliver resources reserved, ready to start experiments

Next we will see how to log on to individual reserved resources…..


Comments off

Logging on to GENI

Once you have your GENI credentials, you will need to generate your ssl and ssh keys and then you can go on to the main tutorial and start exercising your fingers while straining your eyes and  neck….

This is how you will logon to the site and start your first experiment. After speaking with experts in the field, I came to the conclusion to use flack rather than OMNI for my experiment needs. Therefore, I am going to show how to use flack (If you did not take my advise from the previous post, you don’t know what flack is :D)

LOGIN STEPS

1) Go to https://portal.geni.net/ and click on USE GENI button

2) If you are affiliated with one of the partners, select that school otherwise type GENI Project Office in the textbox and allow auto complete

3) If this is the first time you logged in, you will need to wither create a project or join a project. If you have the project lead privilege, you can create a project yourself. Otherwise, you can either request a lead privilege or ask someone else to create a project for you.

4) Once you have created or joined a project, you can see the project when you scroll down. You should click on “Create  Slice”, provide a slice name and description. Remember that slice names should contain only letters and numbers.

5) If this is your first time on GENI, before you can do anything meaningful, the ssh keys should be uploaded. This process needs to be done only once.

6) GENERATING SSH KEYS: You can follow the instructions on the next few screens to generate and download a private key. You must save the private key somewhere so that you have access to it when you connect to the GENI resources from different computers.

7) Now you can go back to the slice from the GENI portal home page and click on “Launch Flack”

8) Next time you login on GENI portal, you can go straight to your slice (or create a new one) and launch flack


Great!! You are now seeing flack on your screen (except if you don’t have adobe flash player installed.. if this is you then go ahead and install flash first)


Comments off

Getting to know GENI

While waiting to get your account, a serious experimenter will start getting used to the GENI terminology. Best place for that would be a GENI summer school or a GENI engineering conference. But one may not have time or money to go to these events. Therefore, we awaken the self-learner within ourselves and decide to learn by staring at a computer screen. If you are going to take this route, then spend a good 2 hours staring at these sites: http://groups.geni.net/geni/wiki/GeniNewcomersWelcome  ,   http://groups.geni.net/geni/wiki/GENIConcepts and take notes because there is a lot to read and remember……


Comments off

GENI: First step

Before starting to get the feel of GENI, one needs to get a GENI account. I requested one from https://portal.geni.net/idp/request.html.  Once you fill out all the details, it can take a few days to get a response from the project office at BBN. Once your request is approved, you will receive a bunch of emails, encouraging you to seek help if you need and getting you all excited about GENI and its potentials. Sure it is exciting but you will be the true judge of that……

Comments off

« Previous entries
Skip to toolbar